
CODShield Merchant Account Setup Guide #
This guide explains every step a merchant needs to create a CODShield account, verify it, add their WooCommerce store, and obtain the License Key and Store ID required to activate the CODShield AI WooCommerce Plugin.
- What is CODShield?
CODShield is a fraud-prevention and conversion-boost platform designed specifically for COD (Cash on Delivery) eCommerce stores.
With CODShield, merchants can:
- Detect risky COD orders using AI scoring
- Reduce RTO (Return to Origin) losses
- Send WhatsApp verification messages
- Enable smart checkout nudges
- Automate fraud prevention workflows
To use these features, every merchant must first create a CODShield Merchant Account.
————————————————————————————-
- Create Your CODShield Merchant Account
Step 1 — Visit the Official Website #
Open the official CODShield website:
https://www.codshield.com
You will find product information, features, pricing, FAQs, and links to the merchant dashboard.
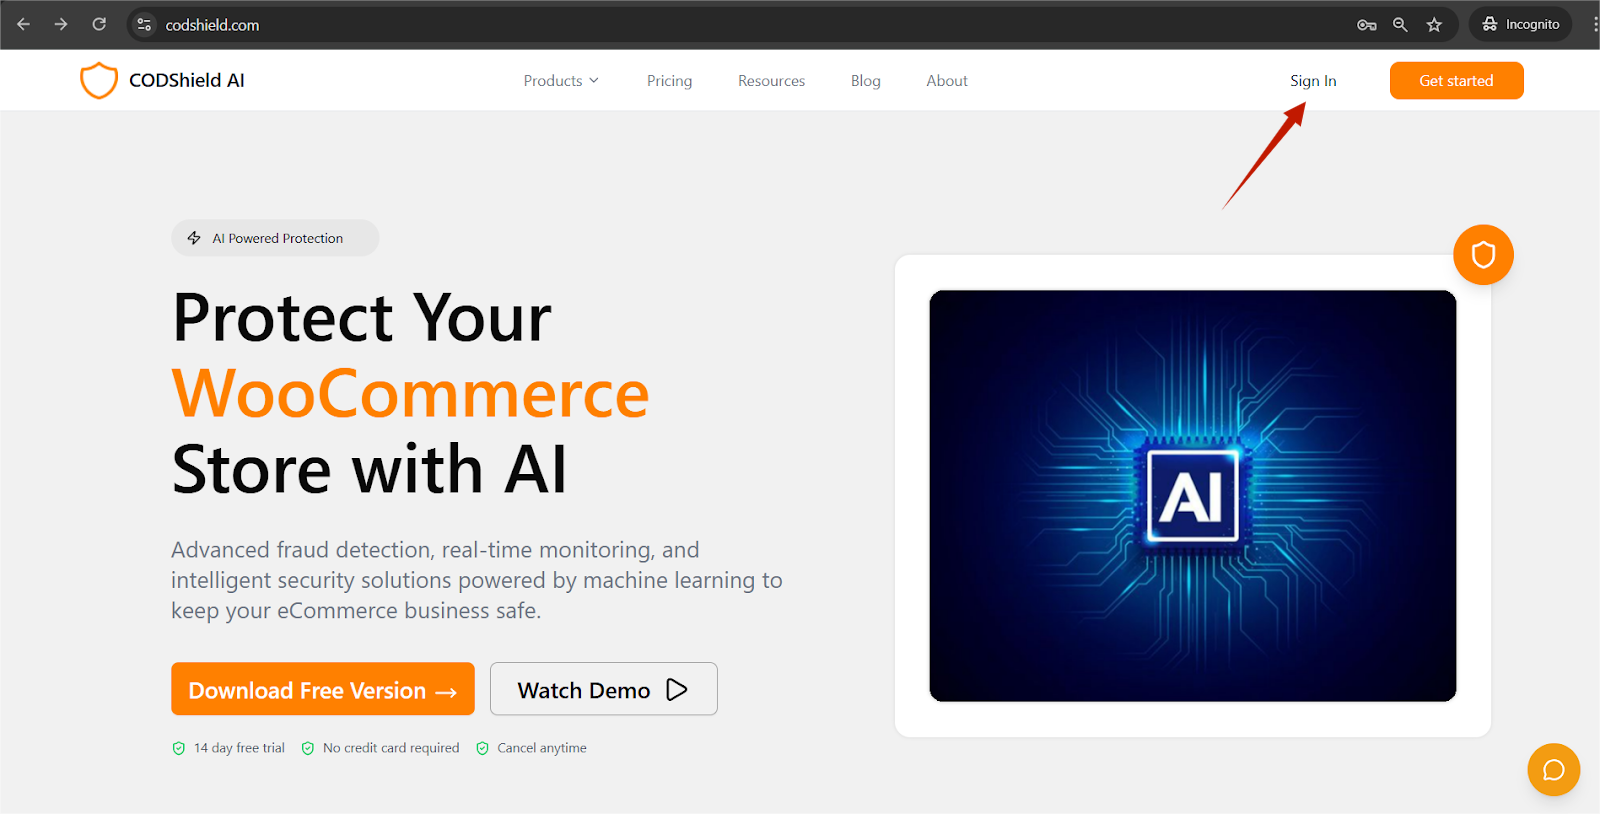
Step 2 — Start the Registration #
On the homepage, click on any of the following:
- Get Started
- Free Trial
- Download
- Sign Up
These options redirect you to the registration portal.
If you want to go directly to the signup page, use:
https://dashboard.codeshield.io/signup
This page allows you to quickly create your merchant account without navigating the website.
————————————————————————————-
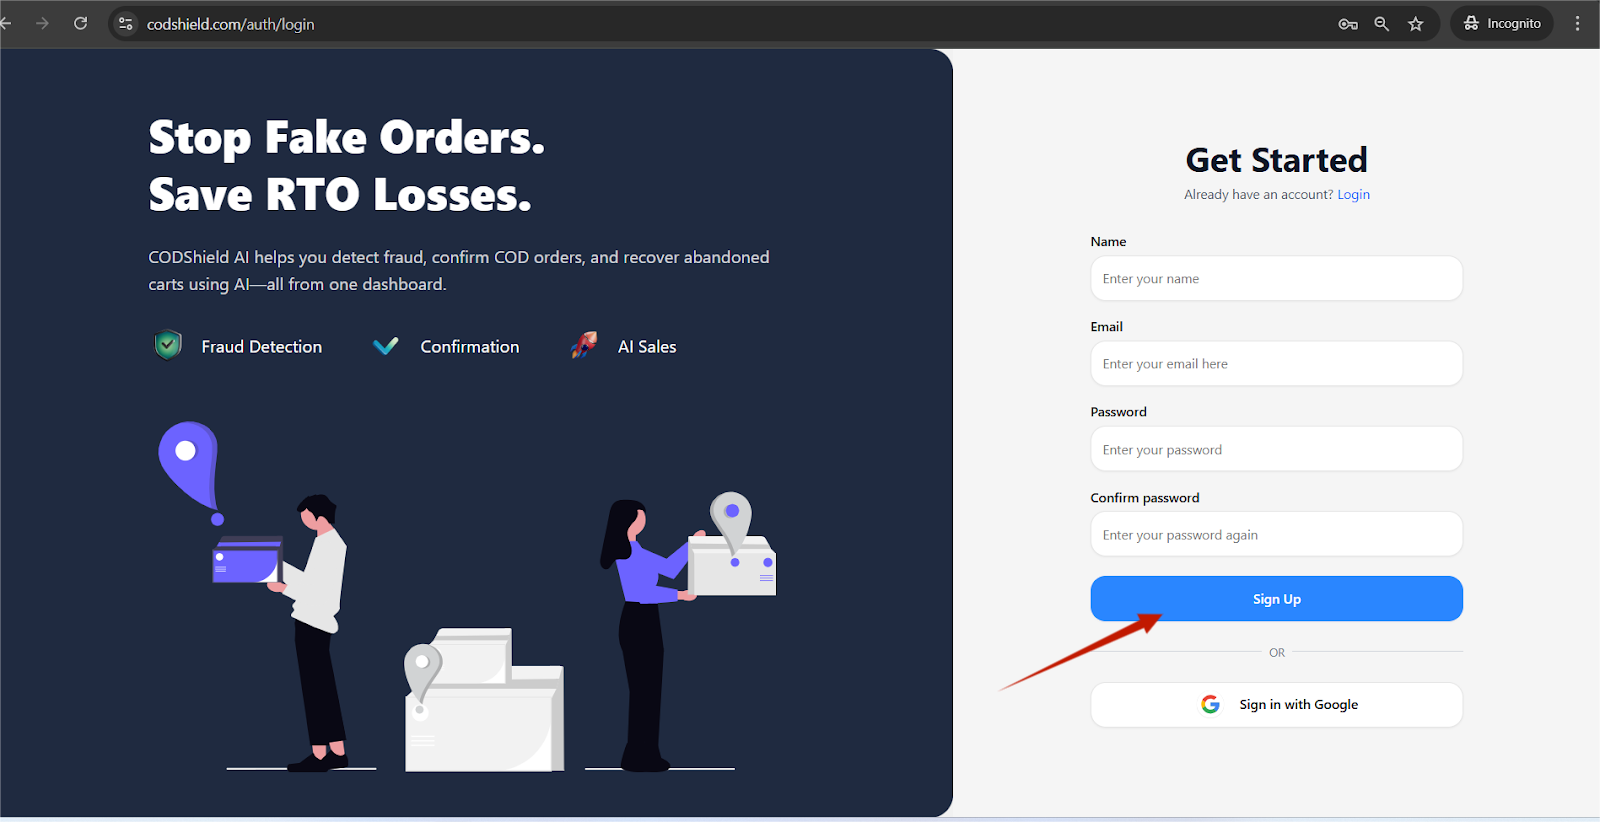
- Complete the Signup Form
Once on the signup page, fill in the required details:
- Full Name
- Business Email Address
- Password
- Business Name
Click Create Account to proceed.
————————————————————————————-
4. Email Verification (Mandatory) #
After submitting the signup form:
- A verification email is sent to the email address you used.
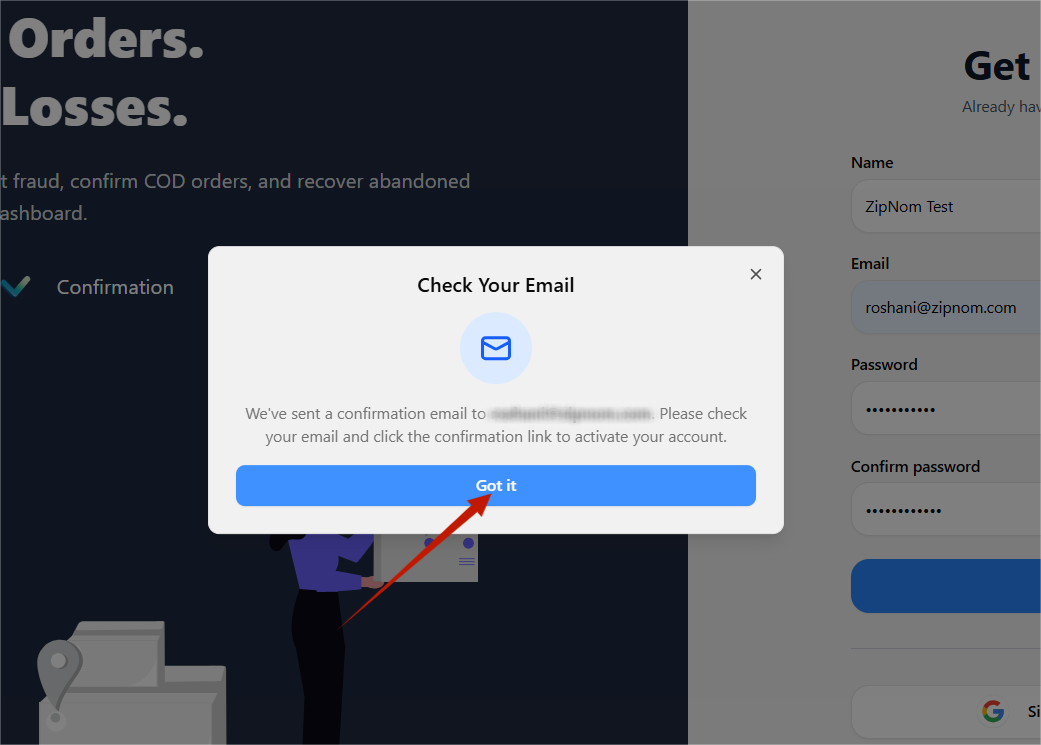
- Look for the email with subject:
“Verify Your CODShield Account” - Open the email and click the Verify Email button.
Important Notes
- You cannot access the merchant dashboard without verifying your email.
- Verification ensures the security of your account and enables plugin activation.
After verification
Once you click the link, you will automatically be redirected to:
CODShield Merchant Dashboard

This is your control center for managing stores, licenses, API keys, WhatsApp settings, usage, billing, and more.
————————————————————————————-
- First Login and Dashboard Overview
After email verification, log in at:
https://dashboard.codeshield.io/login
Inside the dashboard, you will see the following key sections:
- Dashboard – Detail of activated module and connected stores.
- Store – View and edit created store details
- Licenses & Keys – View or generate your plugin license and activation keys
- Modules – Modules list
- Subscriptions – Billing details and subscription details
- Downloads – Can download the addons.
- Integrations – Configure external services and customize automation settings for your store.
Before using the plugin, the next step is to add your store.
————————————————————————————-
- Add Your Store (Required Step)
Why adding a store is important: #
CODShield assigns each store a unique License Key and Store ID.
These are used by your WooCommerce plugin to connect securely with CODShield services.
Step 1 — Click “Add Store” #
Inside the dashboard, go to Stores → Add Store
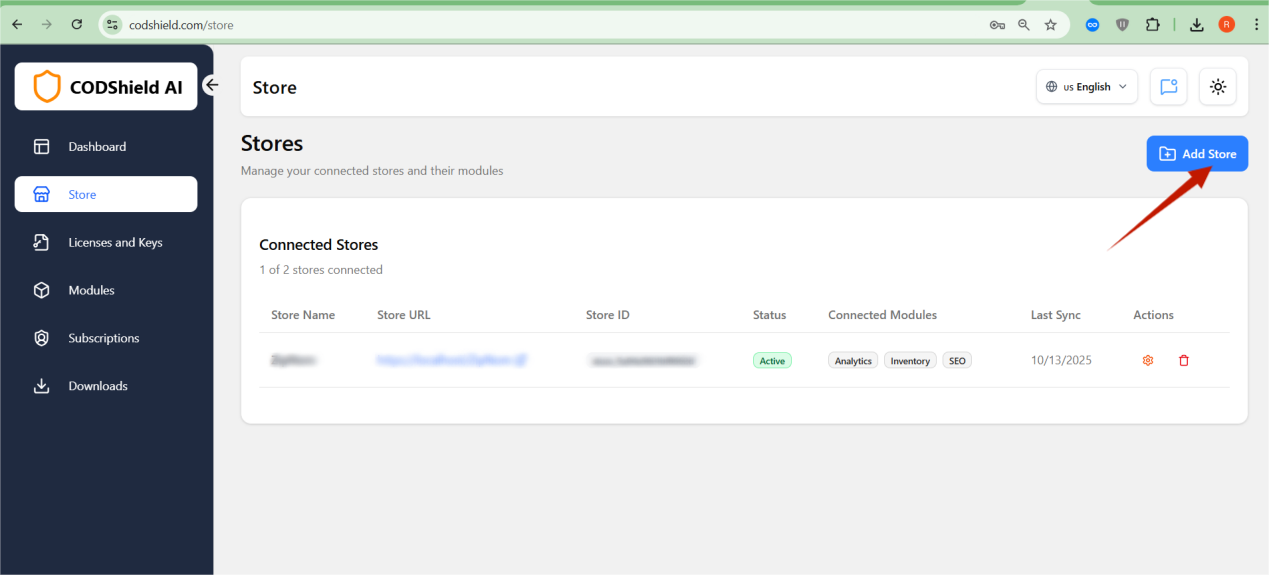
You will be asked to enter:
Store Name
- Your business or website name (e.g., “FashionKart India”)
Store URL
- Your WooCommerce website URL
- Example: https://yourstore.com
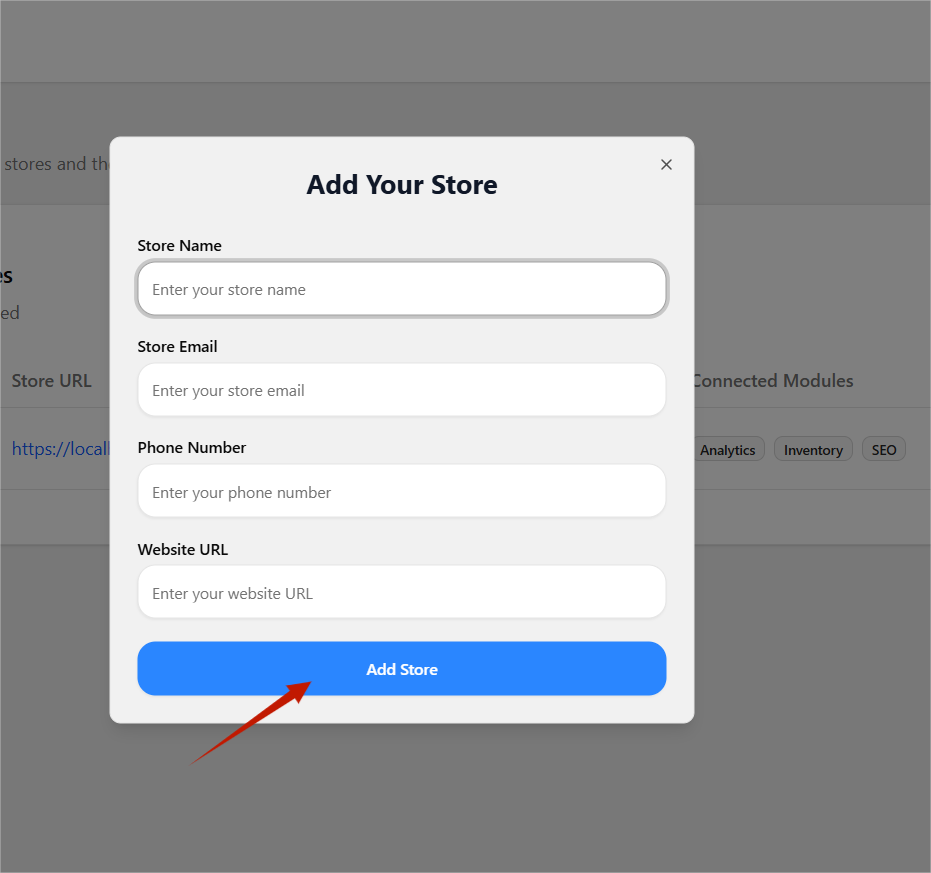
Click Submit.
Step 2 — Store Creation & Auto License Generation #
Once the form is submitted:
- A new store is added to your dashboard
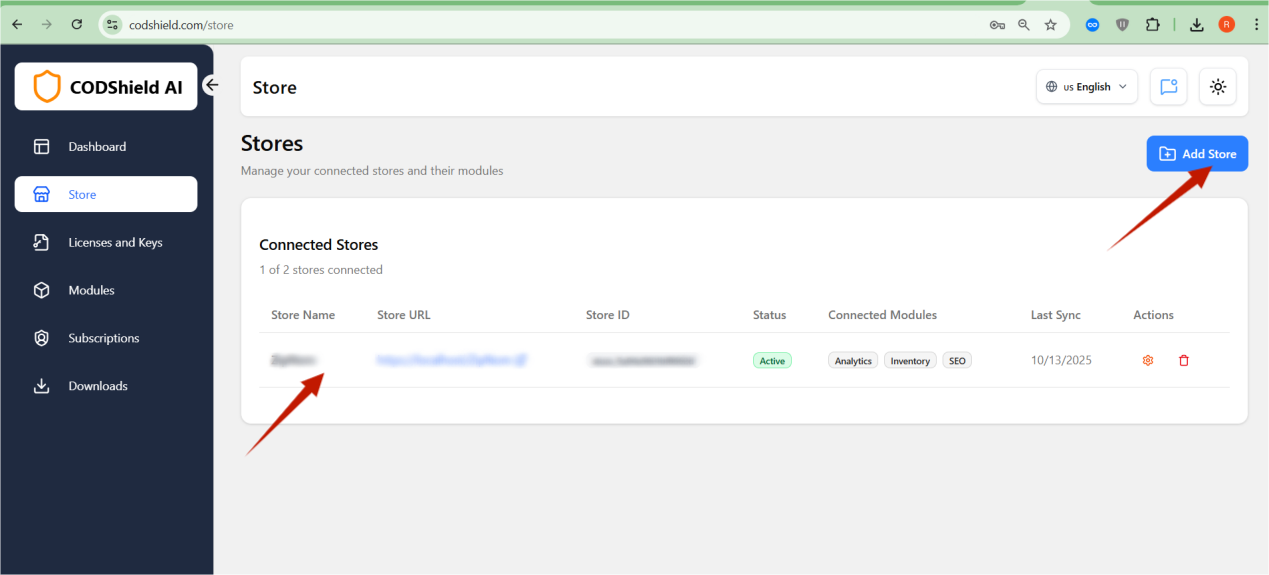
- CODShield automatically generates:
- License Key
- Store ID
- Webhook URL
- API Credentials (optional)
These credentials uniquely identify your WooCommerce installation.
Important Notes
One License Key = One Store
If you operate multiple stores, you must create each store separately
You can always edit store details or regenerate the license if needed
————————————————————————————-
- Get Your License Key & Store ID
After adding your store, open it from the Stores list.
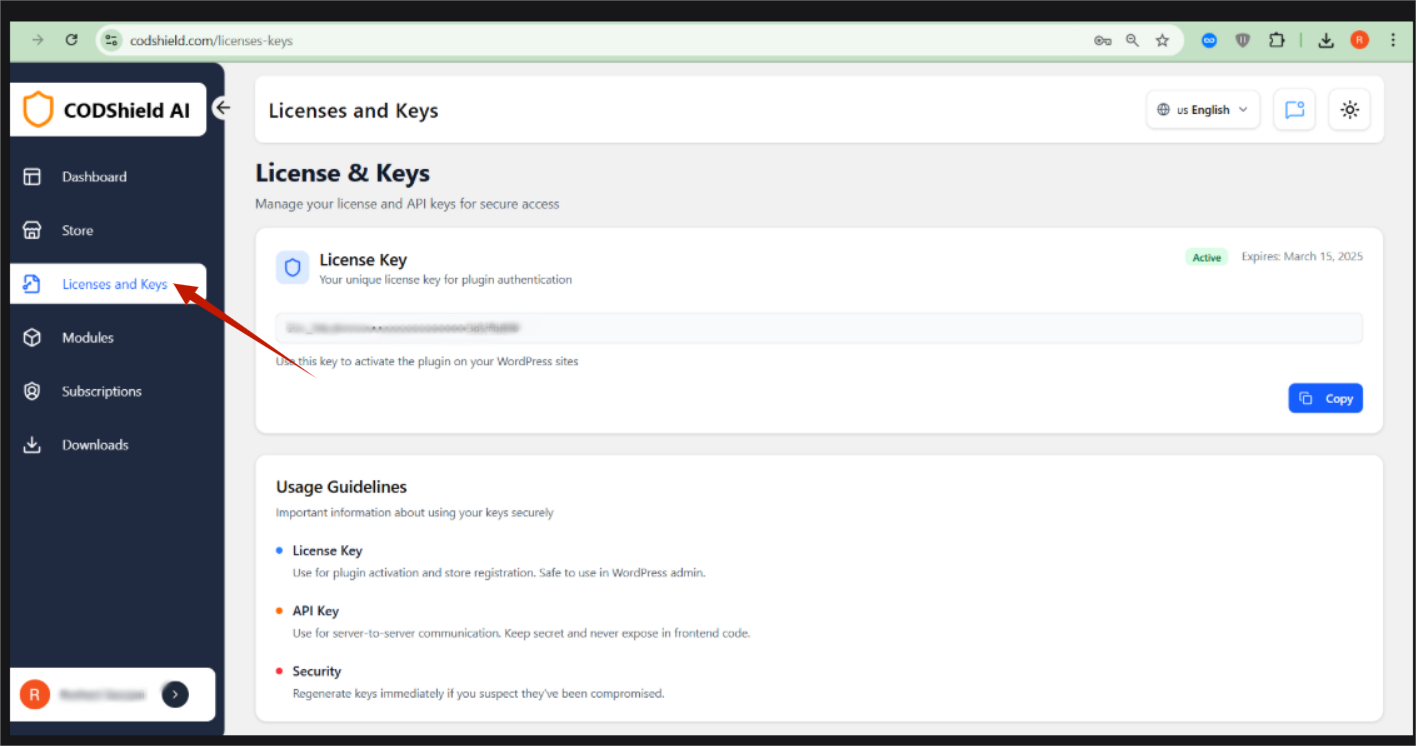
Inside the store card, you will find:
- Store ID
- License Key
- Installation Guide
- Activation Status
- WhatsApp Setup Status
Copy these values and you can copy these values and use them in the Codshield plugin to activate the license.
- License Key → Paste in plugin settings
- Store ID → Identifies your store for fraud scoring, WhatsApp OTP, and smart nudges
These must match exactly, or the plugin will not activate.
Activating CODShield AI Plugin in WordPress (Merchant Guide)
Once your CODShield Merchant Account is created and your store is added, the next step is to activate the plugin inside your WordPress admin panel.
This ensures your WooCommerce plugin is activated to see CODShield’s AI fraud scoring, WhatsApp verification, order analytics, and premium features.
Step-by-Step WordPress Plugin Activation Guide #
Step 1 — Log in to WordPress Admin #
Open:
https://yourstore.com/wp-admin
Enter your WordPress username and password.
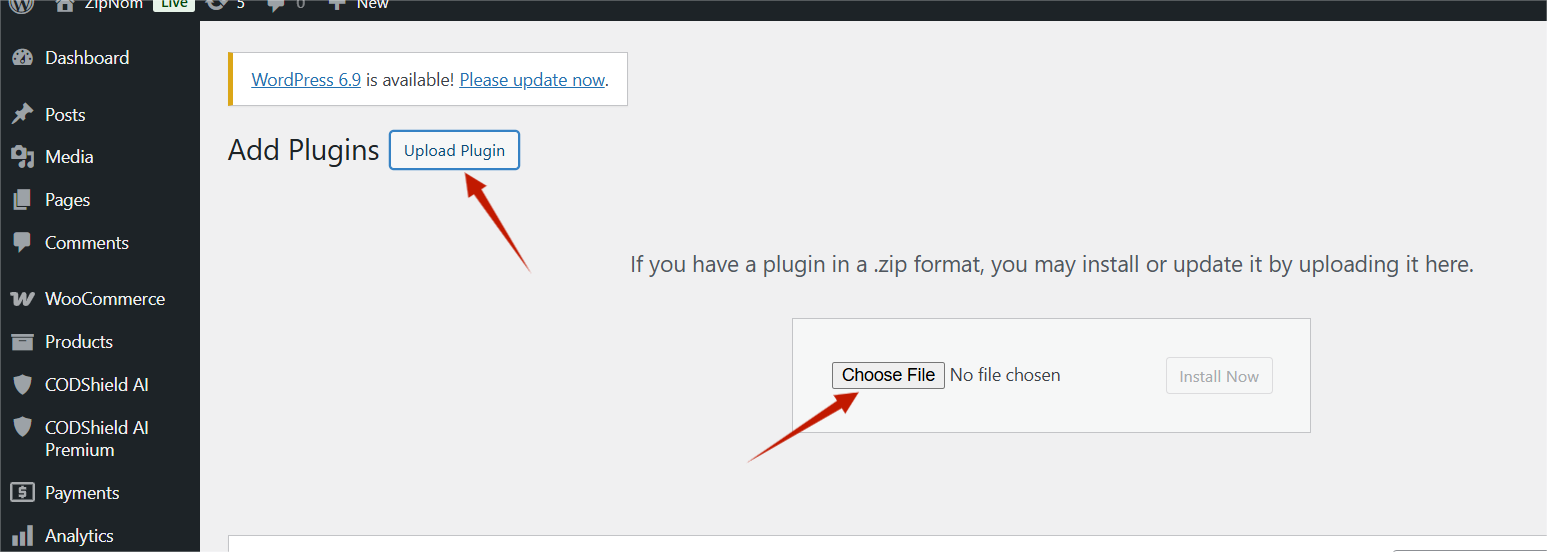
Step 2 — Install the CODShield AI Plugin #
You can install it in two ways:
- Go to Plugins → Add New
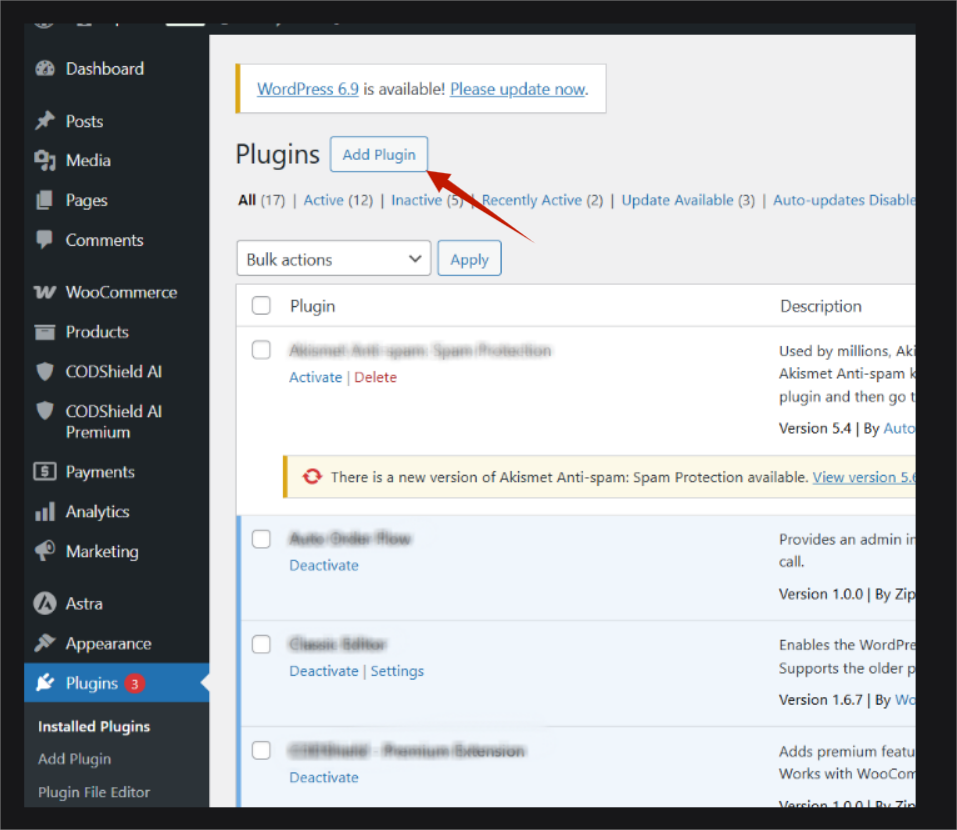
- Click Upload Plugin
-
- Select the CODShield AI plugin ZIP file
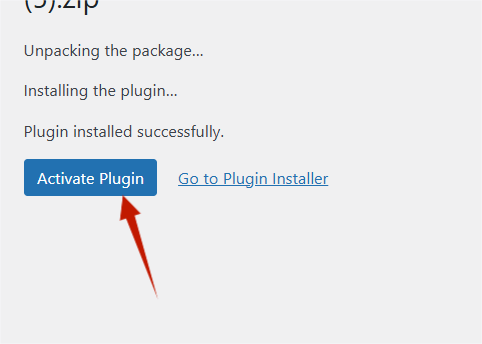
- Click Install Now
- After installation, click Activate
Step 3 — Open CODShield AI Settings #
In WordPress admin:
Go to CODShield AI → License & Keys
This is where you will enter your License Key and Store ID from your CODShield dashboard.
Step 4 — Enter Your License Key (API Key) #
In your CODShield Merchant Dashboard:
- Go to Stores
- Click on the store you added
- Copy the License Key (API Key)
Now paste this key into:
CODShield AI → License & Keys → API key (License Key)
Step 5 — Enter Your Store ID #
Copy the Store ID from your CODShield dashboard.
Paste it into the field:
Store ID
This ID links your WooCommerce website with your specific CODShield store and dashboard analytics.
Step 6 — Click “Activated” #
Once both fields are filled:
- Click the Activated button.
- If your credentials are correct:
- The plugin will connect to your CODShield Dashboard
- The status will change to License is active and connected
- A green badge Active will appear (as seen in your screenshot)

Step 7 — Plugin is Successfully Connected #
When activated:
✔ COD Orders will start receiving AI Fraud Scores
✔ WhatsApp Verification & OTP can be triggered
✔ Analytics will sync to your dashboard automatically
✔ Modules (risk scoring, WhatsApp, nudges) will unlock
✔ Premium features will work if subscription is active
Your WooCommerce store is now fully connected to CODShield.
Step 8 — Verify Activation #
To ensure everything is working:
Inside WordPress #
Check:
CODShield AI → Dashboard
You should see:
- Status: Connected
- Store Name
- License Status
- API Health
Step 9 — Test Your Integration #
- Place a test order (COD).
- If everything is connected:
- The order will appear in CODShield dashboard
- It will receive a Fraud Risk Score (0-100)
- If WhatsApp verification is enabled, OTP will be sent
- Order logs will show risk analysis


