
Create Your HubSpot Account #
Step 1 — Open HubSpot #
- Choose Free CRM.
Step 2 — Create Account #
- Enter your email and click Next.
- Verify email if asked.
- Enter First name, Last name, Industry, Company size.
- Create a password.
- Click Create account.
Step 3 — Create Your Workspace #
- Choose Start with Free Tools.
- HubSpot will load your main CRM Dashboard.
2. Create HubSpot Developer Account (for private apps) #
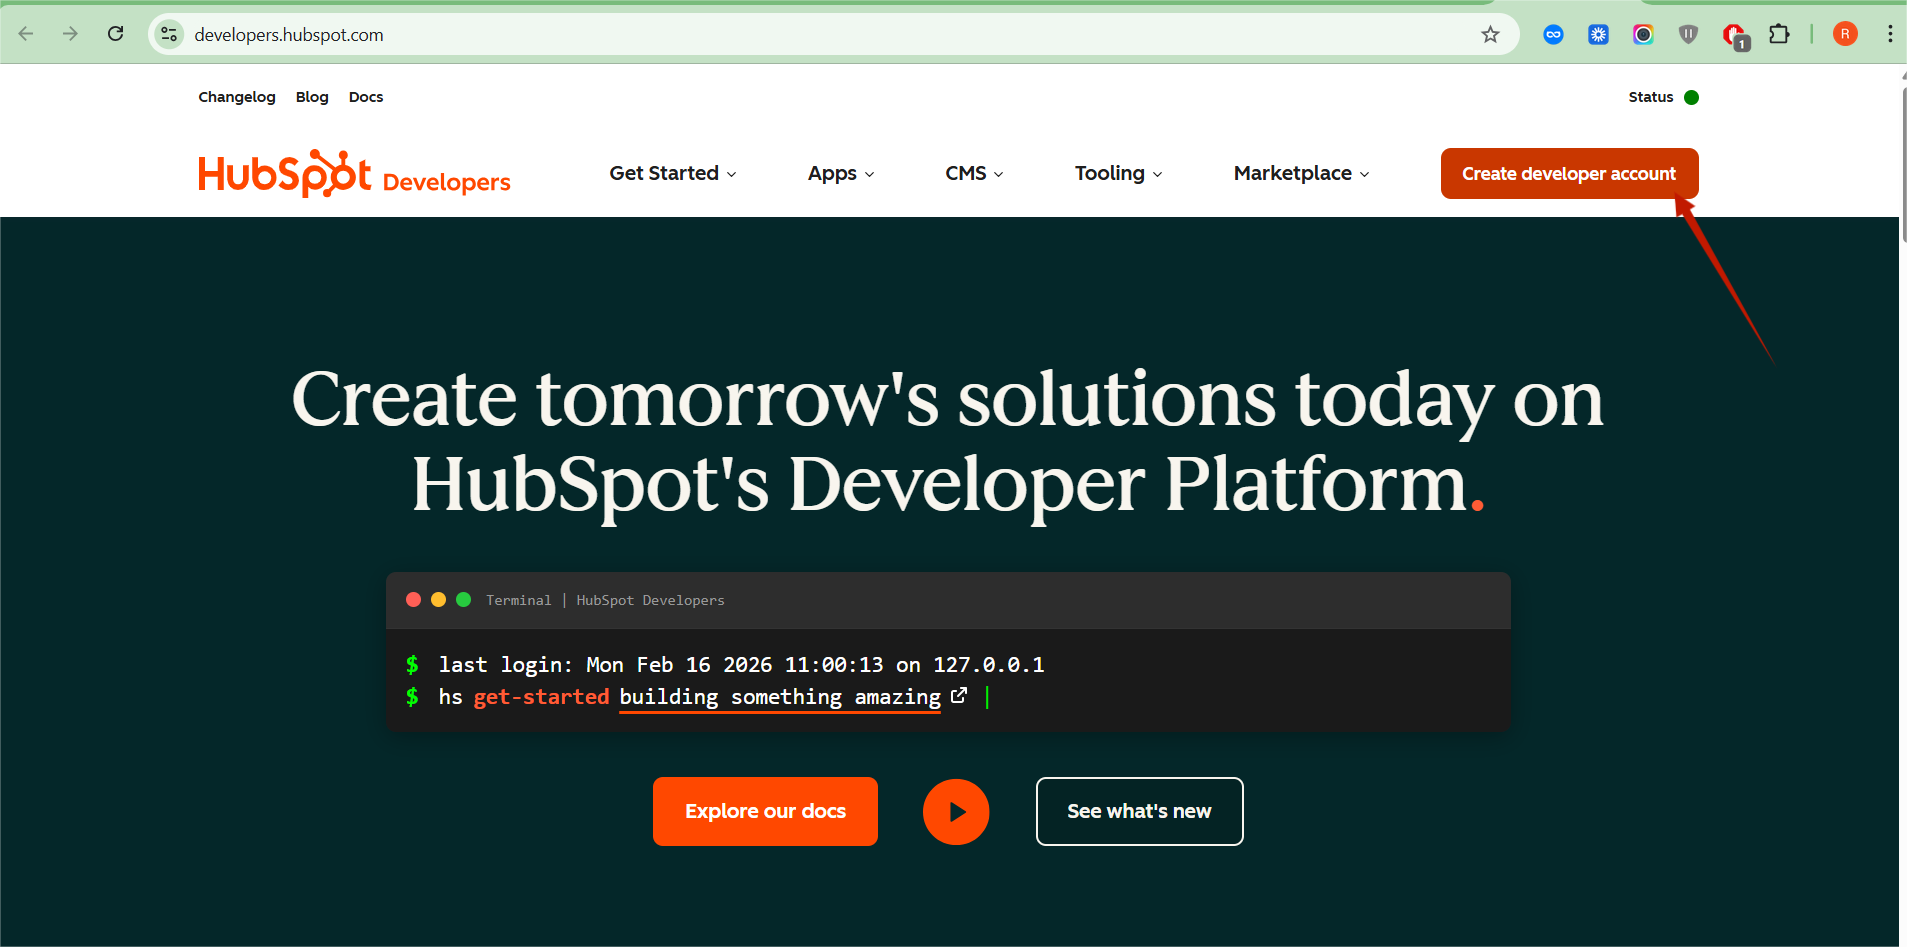
Step 1 — Open Developer Portal #
- Go to: https://developers.hubspot.com
- Click Sign in → Use your HubSpot account.
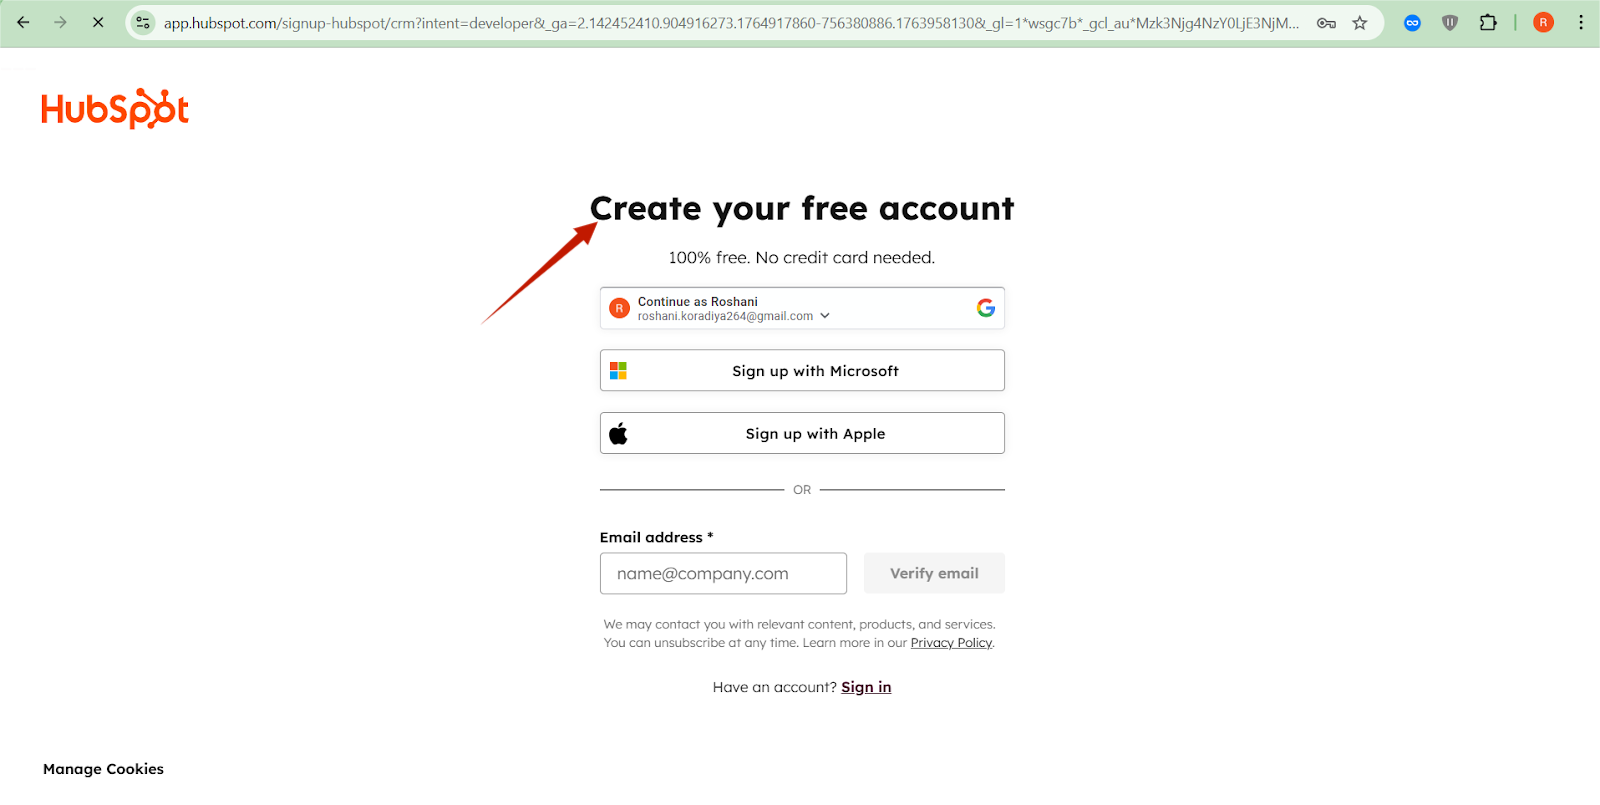
Step 2 — Create a Developer Account #
- Click Create developer account.
- Fill required fields.
- A new developer account dashboard will appear.
Step 3 — Create an App (if using OAuth instead of private app) #
- Go to Apps → Create App.
- Enter App Name.
- Open Auth tab.
- Add redirect URL (e.g., your site URL + callback endpoint).
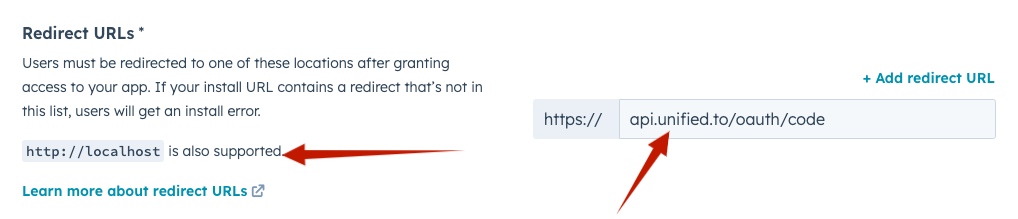
- For CODShield WooCommerce integration, Private App API Keys are recommended instead of OAuth.
3. Create HubSpot Private App (to get Access Token) #
Step 1 — Open App Settings #
- In your HubSpot CRM dashboard, click Settings (⚙).
- Left menu → Integrations → Private Apps.
Step 2 — Create Private App #
- Click Create Private App.
- Enter:
- App Name: CODShield HubSpot Sync
- Description: WooCommerce → HubSpot contacts & deals sync integration.
Step 3 — Set Permissions #
- Go to Scopes/Permissions tab.
Enable these permissions:
CRM Contact Permissions #
- crm.objects.contacts.read
- crm.objects.contacts.write
CRM Deals Permissions #
- crm.objects.deals.read
- crm.objects.deals.write
CRM Schemas #
- crm.schemas.contacts.read
- crm.schemas.deals.read
(Optional) Others #
- crm.objects.custom.write (if creating custom properties)
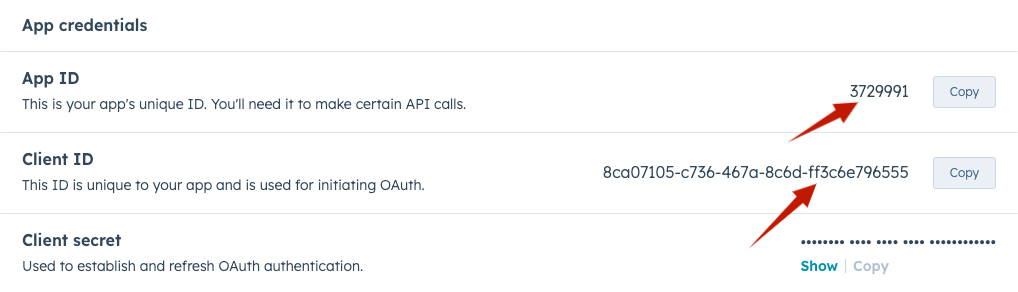
Step 4 — Generate Access Token #
- Click Create App.
- HubSpot displays your Private App Access Token.
⚠ Copy the token. It will not be shown again!
Save it in:
- WooCommerce integration settings
- Environment file
4. Required API Endpoints for CODShield #
Below are the HubSpot REST endpoints you need.
4.1 Create Contact #
POST https://api.hubapi.com/crm/v3/objects/contacts
Body example:
{
“properties”: {
“email”: “test@gmail.com”,
“firstname”: “Rahul”,
“lastname”: “Sharma”,
“phone”: “9876543210”
}
}
4.2 Create Deal #
POST https://api.hubapi.com/crm/v3/objects/deals
Body example:
{
“properties”: {
“dealname”: “Order #1024”,
“amount”: “1200”,
“dealstage”: “appointmentscheduled”,
“pipeline”: “default”
}
}
4.3 Associate Contact with Deal #
PUT https://api.hubapi.com/crm/v3/objects/deals/{dealId}/associations/contacts/{contactId}/deal_to_contact
5. Connecting CODShield with HubSpot #
Inside your WooCommerce plugin settings:
- Go to CODShield AI.
- Select CRM Sync => Hubspot settings tab.

- Enter:
- Access Token
- Optionally: Pipeline ID, Deal Stage
- Click Save Settings.
Test Connection #
Use the Test API Connection button (if available)
— It calls /crm/v3/properties/contacts to confirm access.
6. How Sync Will Work in CODShield #
On New Order: #
- Create/update contact in HubSpot.
- Create deals.
- Attach order fields as deal properties.
- Associate contact → deal.
On Status Updates: #
CODShield can optionally:
- Update deal stage
- Update deal value
- Add timeline notes


