
Create Your Salesforce Developer Account #
Salesforce requires a Developer Account (free forever) to use API + OAuth.
Step 1 — Open Developer Signup Page #
Go to: https://developer.salesforce.com/signup
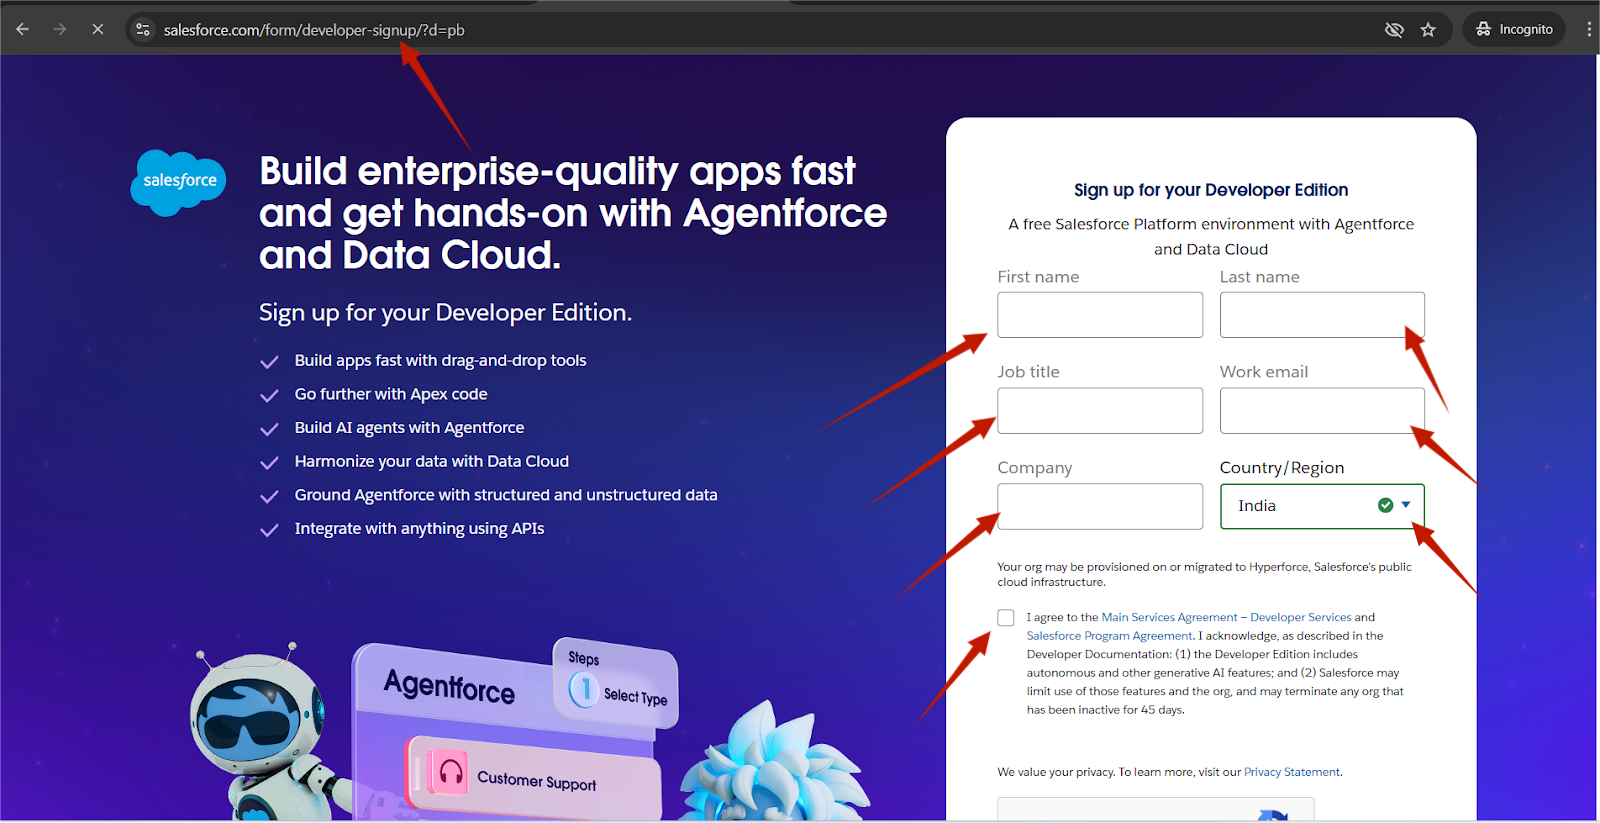
Step 2 — Fill Required Details #
Enter:
- Full name
- Email address (must be valid)
- Company name
- Country
Step 3 — Verify Your Email #
Salesforce sends a verification link to your email.
Click Verify Account → Set a new password → Complete login.
You will now be inside:
Salesforce Developer Org (Sandbox environment)
Create a Salesforce “Connected App” (OAuth Client)
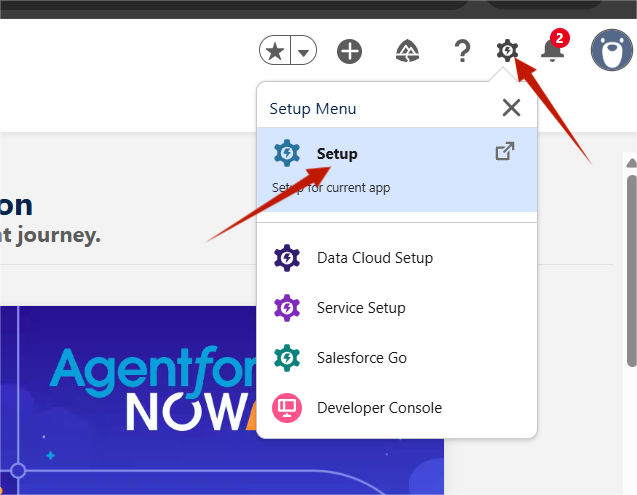
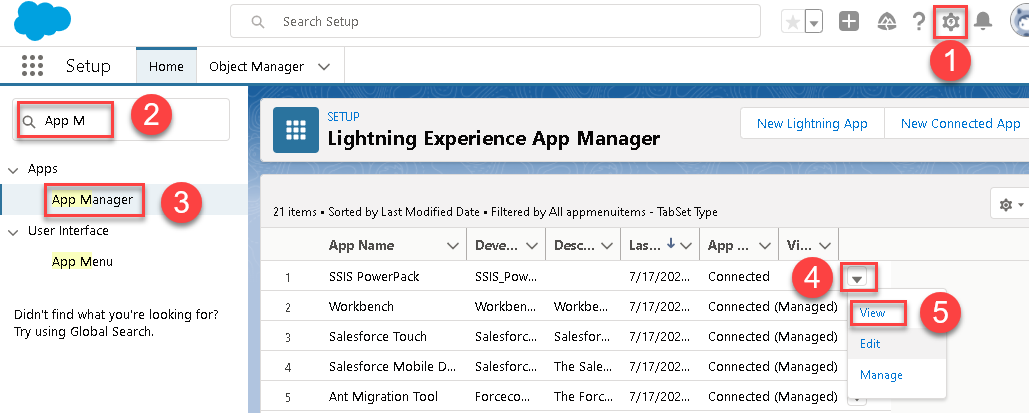
Step 1 — Open Setup #
In Salesforce interface:
- Click ⚙ Settings icon
- Click Setup
Step 2 — Find Connected Apps #
In left sidebar → Search for:
App Manager
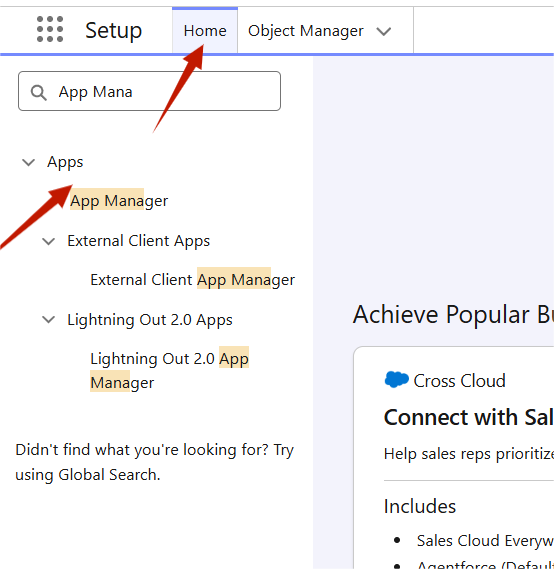
Then click:
New Connected App
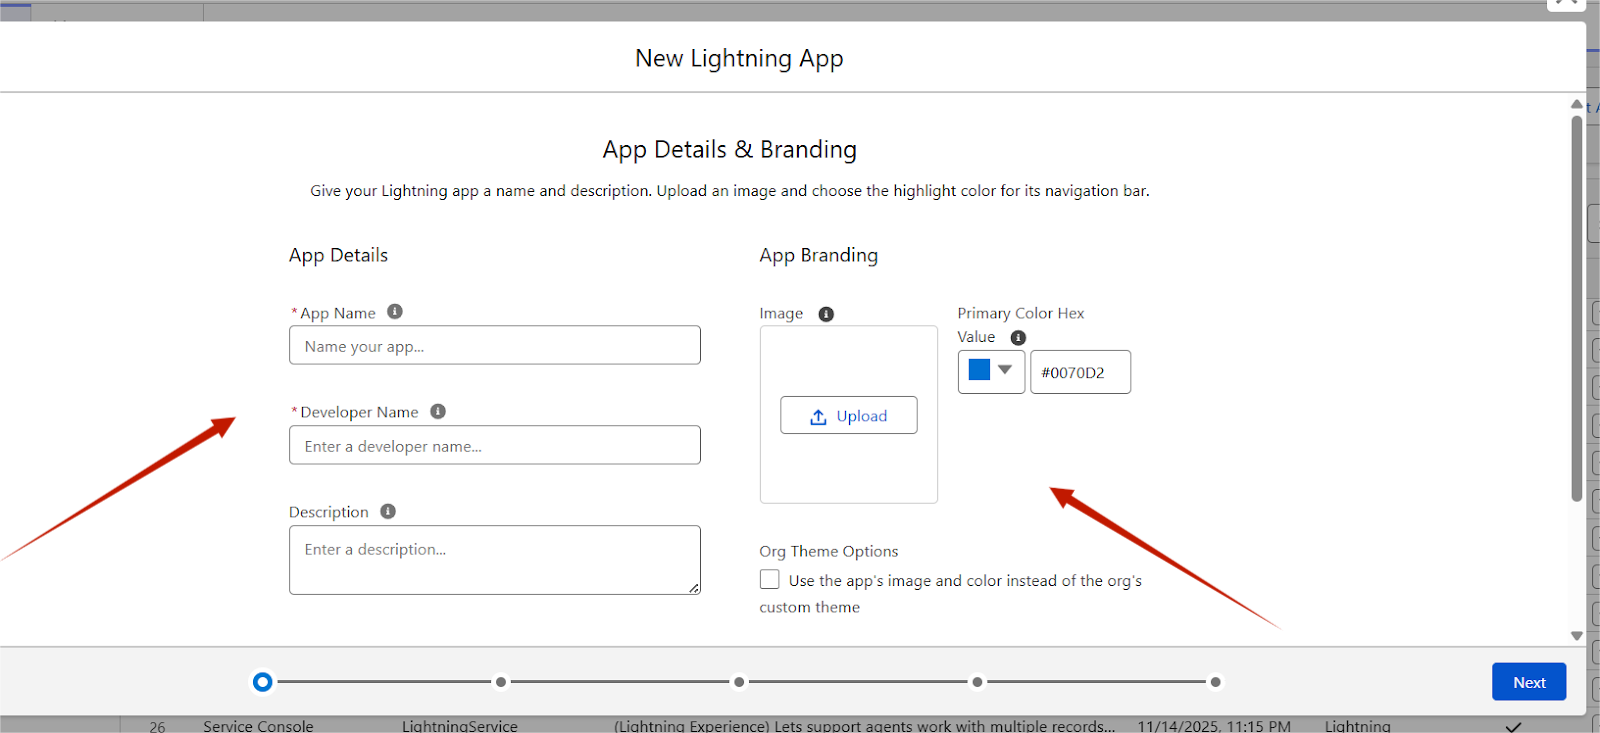
Step 3 — Fill App Details #
Fill:
Connected App Name: YourStore WooCommerce Integration
API Name: Auto-filled
Contact Email: Your business email
Enable OAuth Settings
Scroll to API (Enable OAuth Settings) and turn it ON:
✔ Enable OAuth Settings → check the box
Now additional fields appear.
Add Redirect URI (VERY IMPORTANT)
Your plugin will show a Redirect URI.
Paste that EXACT link here:
Callback URL (= Redirect URI)
Example:
https://yourstore.com/wp-admin/admin-post.php?action=wc_salesforce_handle_code
Note:
- Must be HTTPS
- Must match EXACTLY
- Salesforce does NOT allow localhost unless using special domains
If using local development:
Use ngrok → get https URL → place that in Callback URL.
Choose Salesforce OAuth Scopes
Minimum required scopes:
✔ Access and manage your data (api)
✔ Perform requests at any time (refresh_token, offline_access)
✔ Full access (full) → optional but easier for merchants
Recommended selection:
Selected OAuth Scopes:
- api
- refresh_token offline_access
- full
Move scopes from left → right.
Click Save.
Salesforce will show:
⚠ “It may take up to 10 minutes to propagate changes.”
This is normal.
OAuth will not work until Salesforce activates the app (5–10 minutes wait).
Get Your Client ID & Client Secret
After saving:
- Go to App Manager
- Find your new app → click Manage
- Click Consumer Details
Now you will see:
- Consumer Key (Client ID)
- Consumer Secret (Client Secret)
Copy these values and paste them into your plugin settings.
Enter Salesforce Credentials in Your Plugin
In WordPress → Go to plugin settings (Salesforce Integration):
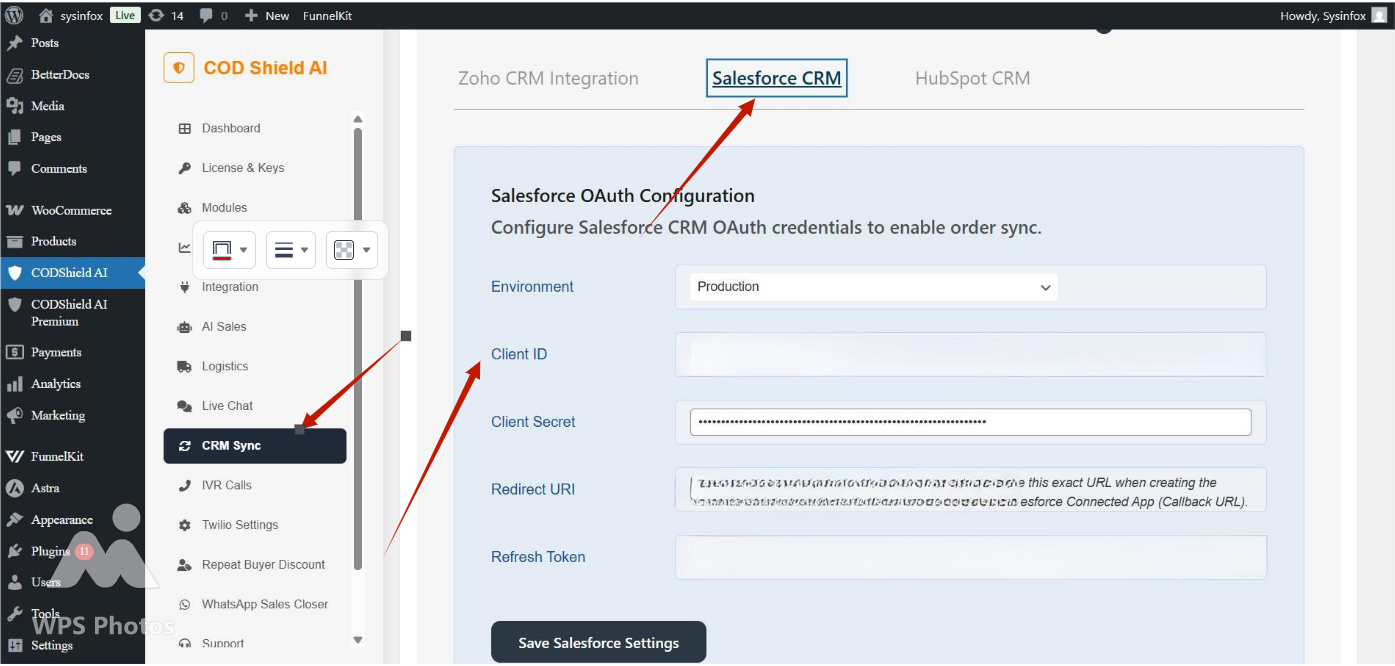
Enter:
Salesforce Region (default: login.salesforce.com)
- Client ID
- Client Secret
- Redirect URI (already pre-filled by plugin)
Click Save Settings.
Test the Integration
Make a test request:
- Create a Lead in Salesforce
- Sync WooCommerce test order → Salesforce Lead
- Verify fields: Name, Email, Phone, Order ID, Total
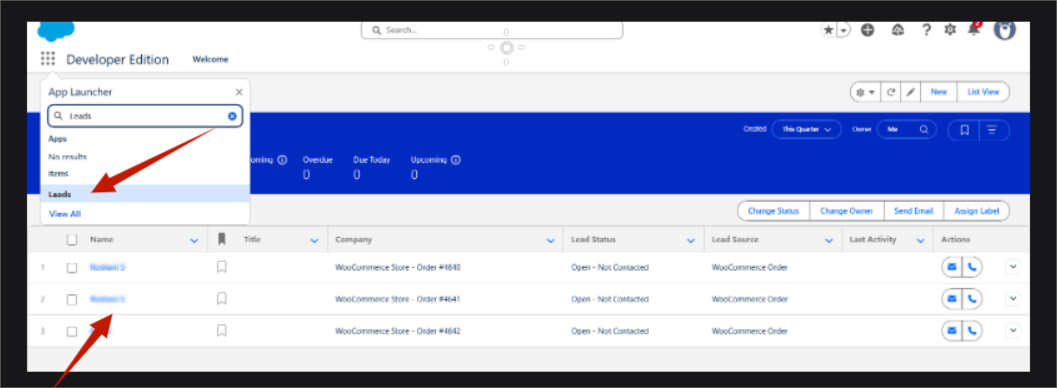
If Lead appears → integration successful.
| Issue | Reason | Fix |
|---|---|---|
| Redirect URI mismatch | URI not same | Copy/paste exact plugin URI |
| app not authorized | propagation not finished | Wait 10 minutes |
| No refresh token returned | missing scopes | Add: refresh_token offline_access |
| invalid_grant | user revoked permission | Re-authorize |
| local dev blocked | HTTP not allowed | Use HTTPS tunnel (ngrok) |


